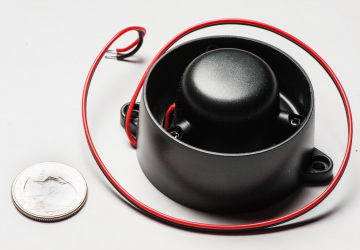
 The RadioShack 108dB Piezo Buzzer
 It is a piezo-based unit that produces a high pitched warbling siren, runs off of 12V DC at a rated 150mA and weighs a mere 34.5g (1.2oz, 1.5oz when you include the wire).
Despite its diminutive size, it will make you flinch. Comments on the RadioShack website include: "is also fun to scare people with", "give you an instant head-ache", "suggest ear-protection...or you'll be scraping earwax off the walls". Researchers use it to scare rats.
Although there is a big world of speakers and buzzers out there, this product has a number of features that made it a good starting point for our design:
- It is small and light - for comparison the battery we use to power it is 22g (1100mAH, 3.6V). We wanted something you could throw in a gym-bag and forget about. As we'll find out later, traditional loudspeakers are also an option, but the most efficient ones have big magnets and can weigh more than a pound.
- It is electrically efficient - and so it can be a 'forget about the batteries' piece of equipment. Dave has been able to run the original prototype for half a year (20-30 workouts) or more on a single set of eight AA batteries. It turns out that the Arduino micro-controller uses as much power as the siren.
- Most important: it is loud enough for our most challenging workouts. A crowd of 70+ people in Bryant Park in the middle of Midtown Manhattan can hear the siren clearly to start and stop on cue.
- It is always at full volume. 108dB will get you thrown out of quieter parks and embarrass you in the gym. This would limit our potential market to large outdoor training groups in urban areas.
- It only plays one sound. Although good for our super-noisy NYC environment, not everyone wants to be reminded of a car alarm when working out.
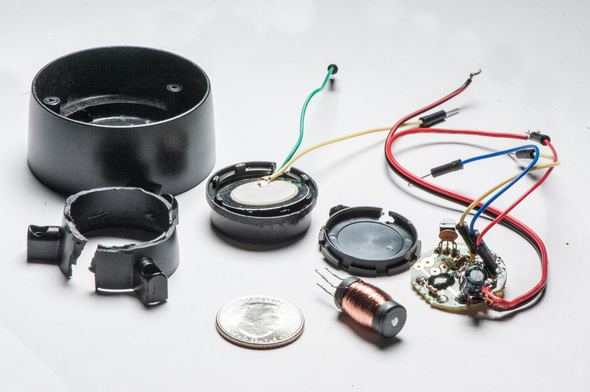
- It has to be modified. I cannibalized the siren we use in our prototype by sawing around the perimeter of the bullet with a jeweler's saw, de-soldering the leads to the piezo element, installing external wires for our own sound driver, and re-assembling it with a piece of double-stick tape. It would take work to achieve the fit and finish expected in professional equipment.
- It is a retail product. I went to the flagship RadioShack store in Union Square and bought the two that they had in stock (only certain stores carry them). One of them was in a torn-up plastic bag that looked like it was from the eighties. The other was in a bedraggled blister pack. It is possible that RadioShack made ten thousand of these fifteen years ago, and is just selling that inventory.
How loud does it get?
With the next generation driver circuit done, it was time to test against the standard again.
I set a calibrated microphone (which plugged into my smartphone) one foot away from the buzzers and set them off. The Tabata Timer played a sampled version of the RadioShack siren sound that I had previously recorded. I measured the maximum SPL (sound pressure level) using an SPL measurement app on my phone. I also measured the current and voltage used by the circuit to estimate how much power was being used to deliver the sound - important because the amount of power used also determines the battery life. From that I could calculate the an effective sensitivity rating (i.e. how much sound it can produce for a given amount of power). I could then compare it to other known speakers.
After a few days of playing with the circuit parameters (increasing the feedback circuit gain, maximum current, and setting the low-pass filter values to exclude digital switching noise), these are the results I obtained:
| Buzzer | SPL (dB)1 | Power (watts)2 | Effective sensitivity3(dB @ 1 watt, 1m) |
|---|---|---|---|
| Radio Shack4 | 110.0 | 3.8 | 93 |
| Tabata Timer (damaged)5 | 108.6 | 2.1 | 97 |
| Tabata Timer (undamaged)6 | 111.5 | 2.1 | 100 |
| Piezo tweeter | 111db | ? | 927 |
| Bullet horn driver - no horn | 102db | ? | ? |
| Bullet horn driver- with horn | 122.5db | ? | ? |
| Voice-coil tweeter | N/A | N/A | 1058 |
1Maximum sound pressure level measured at 1ft (30cm), 2.5-3kHz window.
2Average current used by the entire circuit (across a 1 ohm resistor) times voltage (e.g. 12V or 3.6V) while playing the siren sound
3Classical speaker sensitivity is defined as dB at 1 meter at 1 watt, where electrical power is measured at the input to the speaker. To compensate for the close (30cm) measurement we divide the SPL by a factor of about 11 (-10.4dB, see the table) and then normalize to 1 watt. Because the measured electrical power here includes losses in the amplifier/driver electronics (e.g. 70% efficiency for the DRV8662), the figure presented here is a lower bound on the speaker sensitivity
4Intact Radio Shack siren and original circuit, 12 volts
5Modified Radio Shack siren - with some damage to horn
6Modified Radio Shack siren - horn intact
7Classical speaker sensitivity quoted by manufacturer - which does not include losses from amplifier/driver electronics
8Quoted by manufacturer
8Quoted by manufacturer
- 110dB @ 1ft is sufficient for outdoor workouts, this is what the original RadioShack buzzer produces.
- The horn design matters - The Tabata Timer can surpass this but only if it is using an undamaged horn. The previous generation Tabata Timer used a damaged buzzer that I had taken apart with a Dremel. The central 'bullet' was only held loosely in the housing, the top of the bullet was missing, and there were several extra holes in the compression chamber and shell. This was worth a full 3dB (almost twice as loud).
- The Tabata Timer circuit is more efficient than the original RadioShack circuit, using only ~50-60% of the power (measured at the battery) to achieve a 1dB (1.25x) louder sound than the RadioShack siren. With a 1100mAH battery and assuming about 10-15% siren usage per 30 min workout, this is about 40 workouts.
- The RadioShack horn design is efficient - at least compared to what is reported by the manufacturers. One confusing point, however, is that the inexpensive piezo tweeter - which should have a fairly low output (as it is theoretically at least 8dB less efficient) does as well as the RadioShack speaker.
- A real exponential horn blows them all away - the $6 exponential horn causes a whopping 20dB (100x) increase in SPL. I had to back the microphone back to 1 foot, as it was clipping. Like a megaphone, it is probably a bit more directional.
- It is theoretically possible for a voice coil-driven tweeter can be louder/more efficient - either 5.5dB louder, or using ~3.5x less power. This efficiency comes at additional weight and expense. The speaker is larger (3.5 inches across, 2.5 inches deep) and much heavier (1.7lbs) due to the magnets. It retails for ~5x the price ($10 vs $2).
Form factors
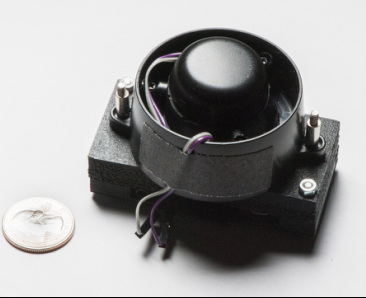 The buzzer installed on the current prototype of the Tabata Timer. Gray and purple wires connect the piezo to the piezo driver in the main case. | 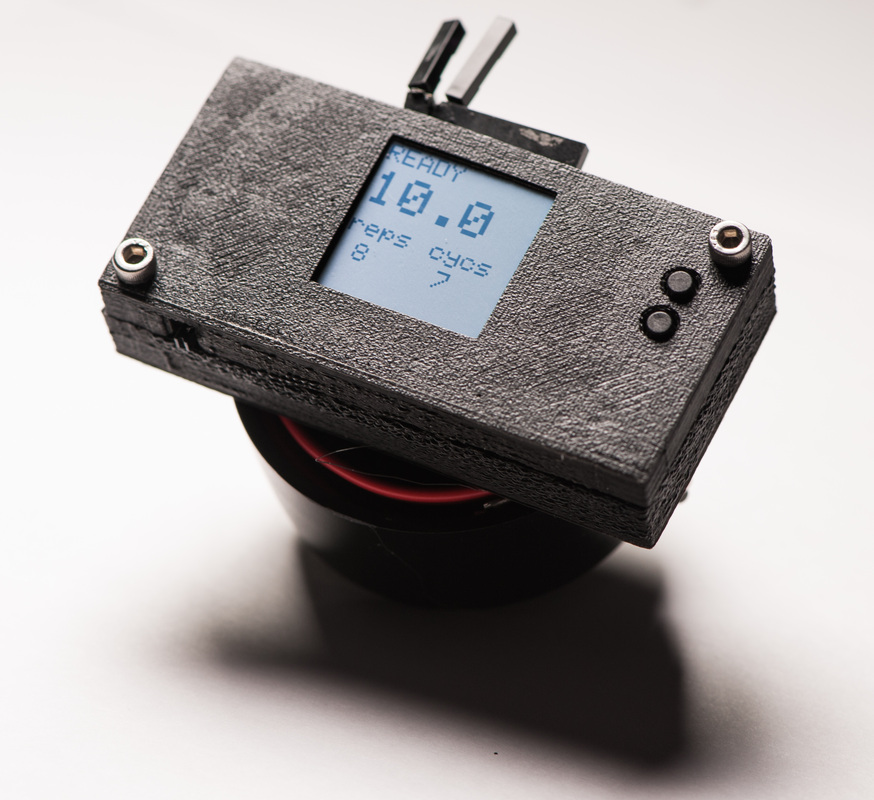 Reverse angle of the Tabata Timer prototype. The buttons on the right side control start-stop-reset. It is set for an interval workout of seven cycles of eight repetitions (20 seconds work, 10 seconds rest with 20 seconds between cycles). |
- At least two form factors are possible - the "mini-light hockey puck" (2 inches across, 1 inch high, <1/4 lb) we had originally imagined, and a "double hockey puck" (3 inches square, 3 inches high, 1.7-2lbs)
- Getting the horn design right may be difficult. The difference in 2-3dB due to a damaged horn was significant - but it isn't clear what caused the degradation. For this, I've acquired a Metal PrintrBot Simple and will begin printing horns to test which features are most important.
- The larger, more powerful speaker may be cost effective and help get to market faster. Although the speaker itself may cost more, the supporting electronics and hardware may be less. Audio amplifier chips that can nominally deliver 2-3 watts into a 4 ohm load are available for less than one dollar, vs the $4-6 of the DRV8662 and supporting components. The batteries could run 2-3x longer - or it could simply be as loud as hell. And to make a simple case may be less expensive and quicker than designing and manufacturing a finicky piezo horn.
- Continue developing the piezo but watch out for difficulty in horn design. The piezo-buzzer is a good match for our imagined market (i.e. small, light, loud). However, it may be difficult to reverse-engineer the RadioShack buzzer. It is made of four injection molded pieces of plastic - the outer plastic 'horn', the inner 'bullet' which holds the electronics and piezo driver, and the piezo resonating chamber (which has a base, lid and the piezo element). Whether 3D printing will be able to achieve the tolerances required to replicate this is unclear - but since we have a working model and know what kind of performance we need, it should be quick to test this option.
- Quickly explore the voice-coil option. Amplifier chips are abundant, efficient, and easy to use (certainly compared to the fiddly DRV8662), and more importantly, there is no need to get into acoustic horn design - a simple rectangular frame to hold the speaker is enough. It should be quick to build, test if it achieves the SPL we need and measure how much power it takes to do so. It will also let us see how the additional size/heft affects the way we use and perceive the product.
Lessons
- Measurements are difficult and time-consuming, but worthwhile to get right. I spent a lot of time getting the same sample to be played, and many hours with earplugs in my ears, setting off the siren. But, being able to compare our design against absolute standards (e.g. speaker sensitivity) gave a lot of insight. It also helped to identify problems (e.g. a 3dB shortfall due to damage) and make strategic decisions - like how much effort to spend improving the current design, and how much to spend on an alternative path.
- Don't use cost as a primary for making decisions. The high retail price of traditional speakers biased me against a solution that I could have considered earlier. Costs are very difficult to estimate at this stage. Instead, look carefully at the audience you are designing for and what assumptions you are making about what is valuable for them.
- Be comfortable with making early choices - and reversing them later. We had to start with a design that we knew worked in the field. But that's all it is - a starting point.
Please let me know what you think. And best of luck with your designs out there!
 RSS Feed